Three years ago, I stood in my living room staring at a dated brick fireplace that had been painted over multiple times, each layer attempting to modernize what was fundamentally tired and uninspiring. I knew I wanted something rustic that would complement my home’s farmhouse aesthetic, but I wasn’t sure where to begin. After researching options, I discovered that rustic tile could transform my fireplace into a stunning focal point that combined old-world charm with practical durability. The journey from that painted brick to my current tile masterpiece taught me everything about choosing, installing, and living with rustic tile that genuinely enhances daily life.
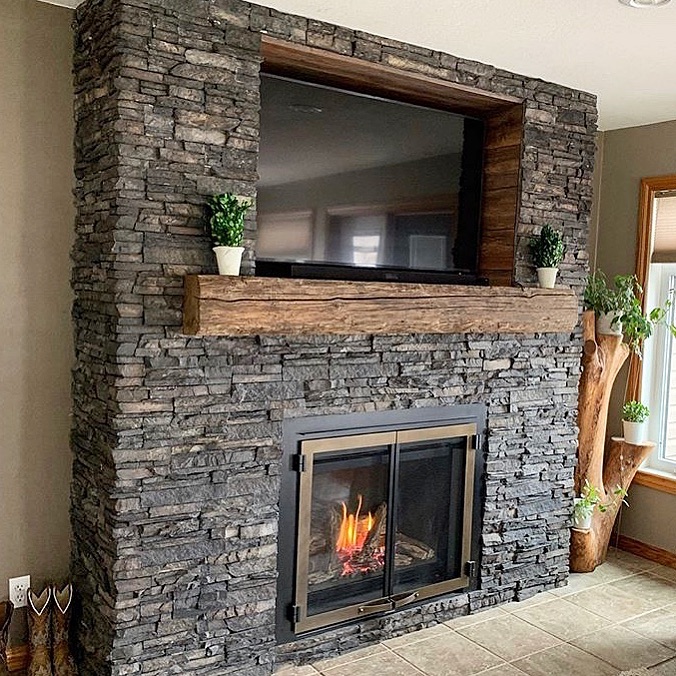
Choosing the right rustic tile style became an education in itself. I visited countless tile showrooms and spent hours online comparing options. I learned that rustic tiles come in an amazing variety: rough-hewn slate with natural cleft surfaces, hand-painted terracotta with artisan glazes, tumbled travertine with organic pitting, and textured porcelain designed to mimic aged stone or weathered wood. Each type offered different aesthetic qualities and practical considerations. I eventually chose a combination of large-format slate tiles for the main surround and smaller terracotta accent tiles in earth tones. The mixed textures and warm colors created visual interest while maintaining the cohesive rustic feel I craved.
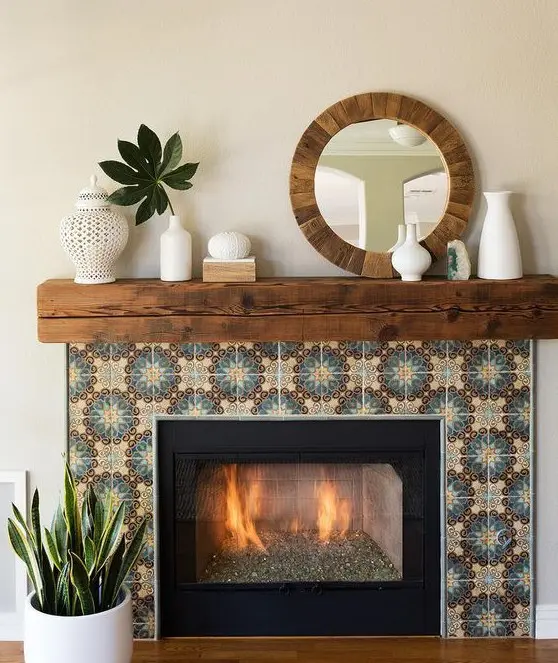
Understanding tile dimensions and layout patterns was crucial for achieving the rustic look I envisioned. Unlike modern installations that often feature uniform tiles in perfect grids, rustic designs benefit from varied sizes and irregular patterns. I chose to mix twelve-inch square slate tiles with smaller six-by-six terracotta accents arranged in a random pattern rather than uniform rows. This approach mimicked the organic, hand-laid appearance of old European farmhouses. I spent an entire afternoon laying out tiles on my living room floor, rearranging them until the pattern felt balanced yet authentically irregular. This pre-planning prevented expensive mistakes during actual installation.
Preparing the existing fireplace surface required more work than I initially anticipated. The old painted brick needed thorough cleaning and assessment before I could tile over it. I used a wire brush and TSP solution to remove loose paint and grime, then applied a bonding primer designed for challenging surfaces. Some areas required patching with mortar to create a level substrate. I also installed cement board on the surrounding wall areas to provide a stable, heat-resistant surface for the tiles. This preparation phase wasn’t glamorous, but I learned that proper groundwork determines whether your finished installation lasts decades or develops problems within years.

The mortar selection process taught me that not all adhesives work equally well with rustic tiles. Standard thin-set mortar works for most applications, but I chose a medium-bed mortar that accommodated the thickness variations in my natural slate tiles. The thicker mortar bed allowed me to adjust tile heights for a flatter finished surface despite the irregular tile backs. I also selected mortar with good heat resistance since it would be near the firebox. Mixing mortar to the right consistency took practice. I wasted my first batch by making it too thin. Getting this technical foundation right ensured my beautiful rustic tiles would stay securely in place through countless heating and cooling cycles.
Installing the tiles myself was challenging but incredibly rewarding. I started at the bottom near the hearth and worked upward, using spacers to maintain consistent grout lines between the uniform tiles while allowing more organic spacing where I placed accent tiles. The heavy slate tiles required strong arms and patience; each one needed proper mortar coverage and careful positioning. I used a wet saw for cuts, which was intimidating at first but became manageable with practice. The natural variations in the slate meant some tiles needed more mortar than others to maintain a relatively flat surface. By the end of day one, I understood why professional tilers command good wages for their expertise.
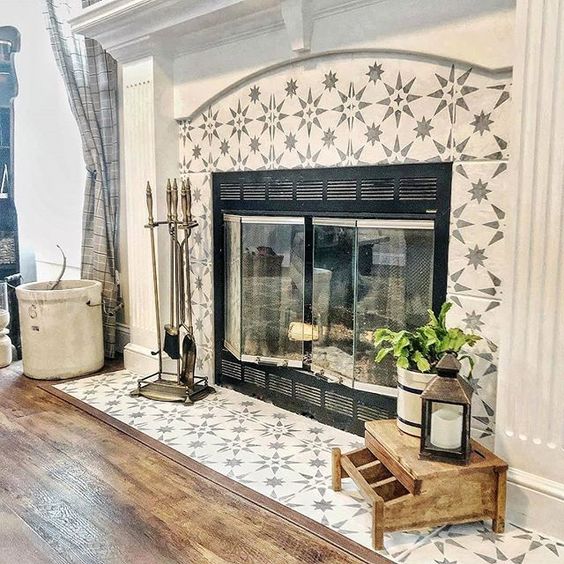
Grouting transformed individual tiles into a cohesive rustic masterpiece. I chose a warm gray grout that complemented both the slate and terracotta without competing with either. Applying grout to textured rustic tiles proved trickier than smooth surfaces because the rough textures grabbed and held the grout. I worked in small sections, pressing grout firmly into joints with a float held at forty-five degrees. Cleaning excess grout required multiple passes with damp sponges, being careful not to pull grout from the joints. The deep recesses and natural pitting in my slate tiles held onto grout residue stubbornly, requiring patient detailing work with smaller sponges and careful attention to each tile’s unique surface texture.
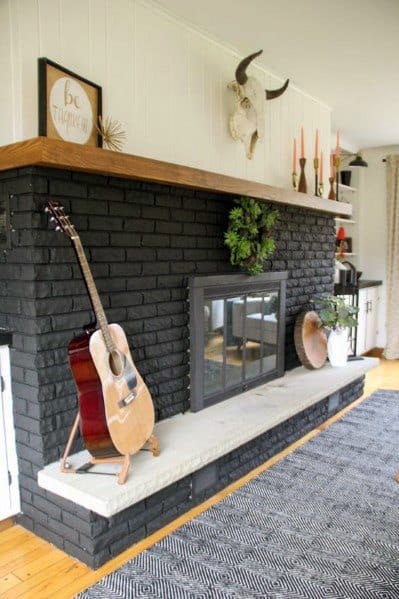
The mantel selection completed my rustic tile fireplace vision. After investing so much effort in the tile work, I knew I needed a mantel that honored that craftsmanship. I found a reclaimed beam from an old barn with hand-hewn character that perfectly matched the rustic aesthetic. The contrast between the smooth, cool tile and the rough, warm wood created dynamic visual interest. Mounting the heavy beam required solid brackets and careful positioning to ensure it aligned properly with the tile work below. The finished combination of textured tile and weathered wood exceeded my expectations, creating a fireplace that feels both timeless and deeply personal.
Adding finishing touches and accessories brought personality to the technical achievement. I installed wrought iron fireplace tools that complement the rustic tile’s old-world character. On the mantel, I display vintage pottery and seasonal natural elements like branches, pinecones, and dried flowers. I added an antique mirror above the mantel that reflects firelight and makes the room feel larger. The rustic tile provides a perfect backdrop for these decorative elements, its textured neutrality allowing accessories to shine without competing for attention. These personal touches transformed the fireplace from a beautiful installation into the heart of my home.
Living with my rustic tile fireplace has been pure joy. The tiles perform beautifully, requiring minimal maintenance while withstanding heat, sparks, and daily use. The textured surfaces hide dust better than smooth tiles would, and the natural color variations mean minor stains or marks simply blend into the existing character. Most importantly, the fireplace has become a gathering point for family and friends. People naturally gravitate toward it, running their hands over the textured surfaces and complimenting the warm, inviting aesthetic. This project not only enhanced my home’s value but created a space that nurtures connection and comfort throughout every season.
What type of rustic tile works best for fireplace applications, and how do I choose?
I learned that heat resistance is the most critical factor when selecting fireplace tiles. Natural stone tiles like slate, travertine, and limestone handle heat excellently and offer an authentic rustic texture. Porcelain tiles rated for fireplace use provide durability with less maintenance than natural stone. I avoided glass tiles and certain glazed ceramics near the firebox opening as they can crack with heat. Consider the tile’s thickness too; thicker tiles (at least 3/8 inch) provide better heat resistance. Look for tiles with natural texture and color variation rather than perfectly uniform pieces. Visit showrooms to see and touch tiles before committing, as photos don’t capture surface texture accurately.
Can I install rustic fireplace tiles myself, or should I hire a professional?
I completed my installation as an ambitious DIYer, but it required significant research, proper tools, and realistic expectations about my skill level. If you have some tile experience and the patience to work carefully, it’s achievable. The challenges include working around irregular fireplace geometry, cutting tiles precisely, and managing heavy materials. I’d recommend hiring professionals if you’re working with expensive tiles, lack confidence in your abilities, or have complex design requirements. For me, the DIY approach saved about $2,000 in labor costs while giving me immense satisfaction. Consider hiring a pro for consultation, even if you do the work yourself.

How much should I budget for materials when creating a rustic tile fireplace?
My material costs totaled approximately $1,200 for a standard fireplace surround covering about 60 square feet. The slate tiles cost $8 per square foot, and terracotta accents were $6 per square foot. I spent $150 on mortar, grout, and sealer, $200 on cement board and other substrate materials, and $100 on tools, including a wet saw rental. The reclaimed wood mantel added another $180. Budget tiles can reduce costs to $600-800, while premium natural stone or custom artisan tiles could push materials to $2,500 or more. Always purchase 15-20% extra tiles for cuts, breakage, and future repairs.
What maintenance does a rustic tile fireplace require, and how durable is it long-term?
Maintenance has been surprisingly minimal over my three years of use. I sweep or vacuum the tiles weekly to remove dust and ash. Monthly, I wipe them with a damp cloth and mild cleaner appropriate for stone. I reseal the grout annually to prevent staining and moisture penetration. Natural stone requires periodic sealing every 1-2 years, depending on use. The textured surfaces hide minor staining and wear exceptionally well. My tiles have withstood direct heat exposure, dropped fireplace tools, and heavy use without damage. Properly installed rustic tiles should last the lifetime of your home with basic maintenance, making them an excellent long-term investment.

How do I ensure proper clearances and fire safety with my tile installation?
Fire safety was my top priority throughout the project. I researched local building codes, which specify minimum clearances between combustible materials and the firebox, typically 6-12 inches depending on fireplace type. All my tiles are non-combustible materials rated for high-heat applications. I maintained larger clearances than code minimum for extra safety. The substrate behind tiles is cement board rather than standard drywall. I used heat-resistant mortar and grout appropriate for fireplace applications. I also had my fireplace and chimney professionally inspected before beginning the project and after completion to ensure everything met safety standards and code requirements.
What are the biggest mistakes to avoid when installing rustic fireplace tiles?
My learning curve included several near-mistakes I managed to avoid or correct. Don’t skimp on surface preparation; poor substrate preparation causes tiles to fail regardless of installation quality. Avoid mixing mortar batches too large; it sets faster than you expect. Don’t rush the grouting process; textured rustic tiles require patient, thorough cleaning. Never forget to seal natural stone tiles after installation; unsealed grout and stone will stain. Don’t install tiles too close to the firebox opening without verifying clearances. Finally, avoid buying exactly the amount of tile you calculated; breakage and cuts always require more than mathematical calculations suggest. Extra tiles also ensure future repairs match perfectly.

Related Posts: