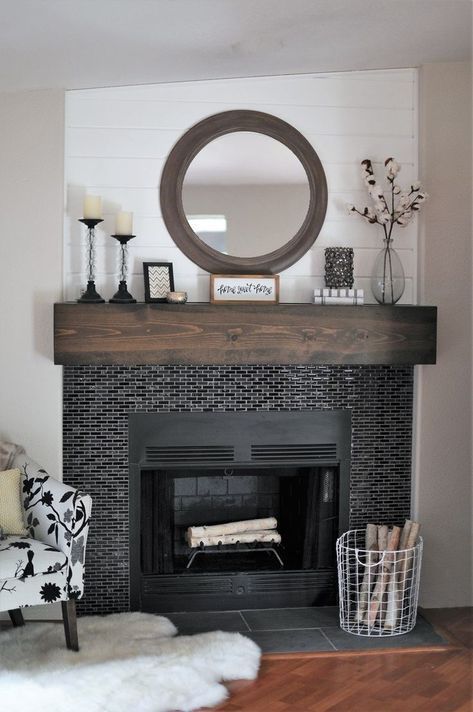
My fireplace makeover journey began with an outdated brick surround that screamed 1980s in the worst possible way. The orange-red bricks clashed with every decorating attempt I made throughout five frustrating years. After scrolling through countless design magazines and Pinterest boards, I became obsessed with sleek grey tile installations. The sophisticated neutral tone promised to complement any future decorating changes I might make. Grey tiles offered the perfect balance between modern elegance and timeless appeal. This decision would completely transform my living room’s entire aesthetic.
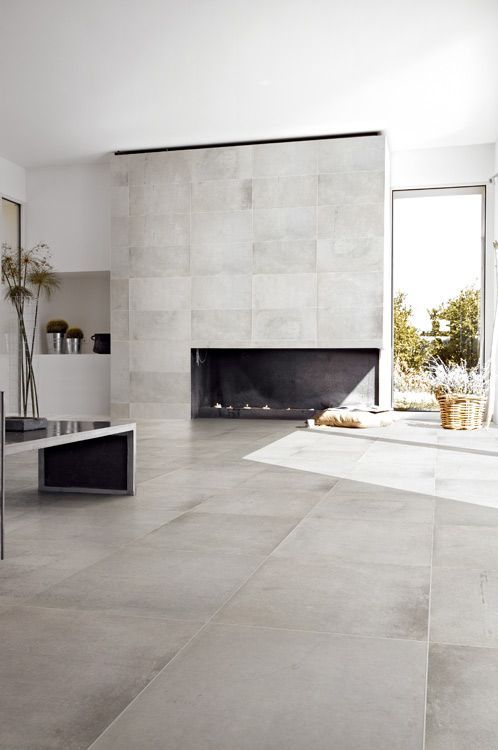
Selecting the perfect grey tile proved more complex than anticipated, with hundreds of shades and textures available. I spent weekends visiting tile showrooms, comparing everything from light dove grey to deep charcoal options. The variety overwhelmed me initially, from glossy subway tiles to textured natural stone surfaces. I collected dozens of samples, arranging them against my existing furniture and lighting conditions. Eventually, I chose a medium grey porcelain tile with subtle veining that mimicked natural marble. The 12×24 inch format provided contemporary sophistication while remaining budget-friendly.

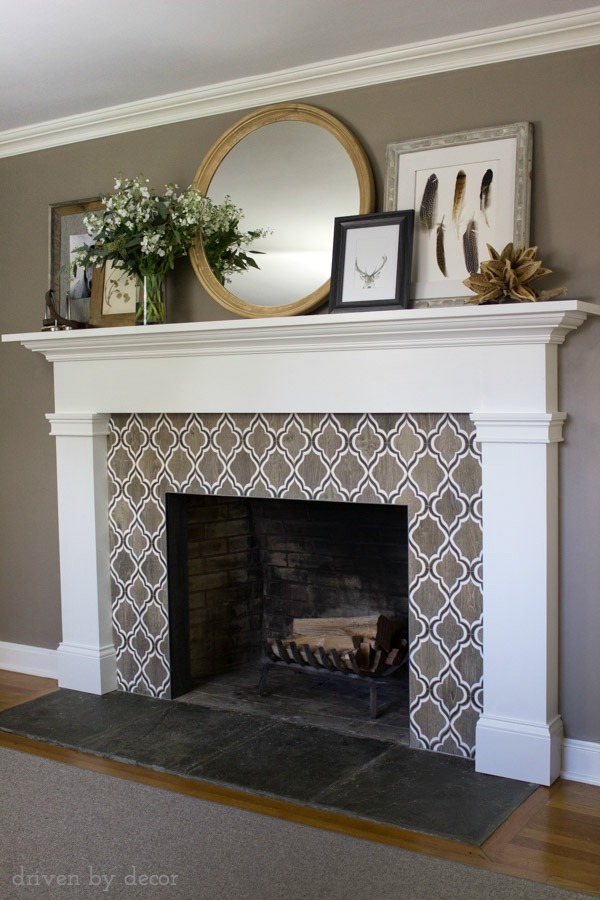
Planning the tile layout required careful consideration of proportions and visual flow throughout the room. I sketched multiple arrangements, considering both horizontal and vertical orientations for optimal impact. The herringbone pattern caught my attention but seemed too busy for my minimalist preferences. Instead, I opted for a clean running bond layout that emphasized the tiles’ elegant proportions. Centering the pattern required precise measurements and mathematical calculations to avoid awkward cuts at corners. Professional planning prevented costly mistakes during the installation process.
Preparation work consumed far more time and effort than the actual tile installation itself. Removing the existing brick required heavy-duty tools and generated incredible amounts of dust throughout my home. I discovered that proper surface preparation determines the success of any tiling project completely. The wall needed extensive patching, priming, and leveling before tiles could be properly installed. Moisture barriers became essential since fireplaces generate significant heat and humidity. This foundational work proved tedious but absolutely critical for long-term durability and performance.
Installation day arrived with excitement mixed with nervousness about my ambitious DIY project. I started early morning with all tools organized and tile layout marked precisely on the wall. Working methodically from the center outward ensured symmetrical placement throughout the entire installation. Cutting tiles around the firebox opening required patience and multiple attempts for perfect fits. The tile adhesive dried quickly, demanding efficient work pace and immediate corrections when needed. Each row built upon the previous, creating satisfying progress throughout the long day.
Grouting presented unexpected challenges that tested my patience and attention to detail significantly. Selecting the right grout color proved crucial, as it would either enhance or detract from the tiles’ appearance. I chose a slightly darker grey grout that complemented the tile color while providing subtle definition. The application process required careful technique to avoid haze or uneven coverage across surfaces. Cleaning excess grout immediately prevented permanent staining that could ruin the entire project. Multiple passes ensured consistent color and texture throughout the completed installation.

The transformation exceeded my wildest expectations when I stepped back to admire the finished fireplace. Grey tiles had completely modernized my living room, creating a sophisticated focal point that anchored the space. The neutral color palette allowed my existing furniture to shine while providing flexibility for future changes. Natural light played beautifully across the tile surface, creating subtle shadows and highlights throughout different times. Friends and family expressed amazement at the dramatic improvement, praising my bold design choice. The investment in quality materials and careful installation had paid off handsomely.
Maintenance routines for grey tiles proved surprisingly simple compared to the original brick surround. Regular dusting with microfiber cloths keeps the surface pristine without special cleaning products required. Occasional damp mopping removes any accumulated soot or debris from fireplace use effectively. The sealed grout lines resist staining and discoloration that often plague lighter-colored installations. Heat from the fireplace causes no damage or color changes to the porcelain surface. Monthly deep cleaning maintains the showroom appearance with minimal effort and standard household supplies.
Decorating around grey tiles opened up exciting possibilities I had never considered before. The neutral backdrop supports virtually any color scheme, from bold jewel tones to soft pastels. Seasonal decorating becomes effortless since grey complements autumn oranges, winter whites, spring greens, and summer blues equally. Metallic accents in gold, silver, or copper create stunning contrasts against the grey surface. Artwork and accessories gain prominence when displayed against the sophisticated tile backdrop. The timeless appeal ensures my fireplace will remain stylish regardless of changing trends.
Five years later, I remain completely satisfied with my grey tile fireplace investment and design choice. The sophisticated appearance continues to impress visitors and provides daily enjoyment for my family. Maintenance requirements have proven minimal, with the tiles looking as pristine as installation day. The neutral color has adapted beautifully to three different furniture arrangements and decorating schemes. Property appraisers noted the fireplace as a significant value-added feature during recent refinancing. This project taught me that thoughtful material selection and careful installation create lasting beauty and satisfaction.

What shade of grey tiles works best for fireplace surrounds?
Medium grey tiles offer the most versatility for fireplace surrounds, complementing both warm and cool color schemes effectively. Light grey provides airy brightness but may show soot more readily than darker options. Dark charcoal grey creates dramatic sophistication but can make smaller rooms feel cramped. I selected a medium grey with subtle veining that mimics natural stone while maintaining consistent coloring. Consider your room’s lighting, size, and existing decor when choosing grey shades. Sample tiles under various lighting conditions before making final decisions for best results.
Which tile sizes and patterns work best for fireplace installations?
Large format tiles like 12×24 inches create clean, contemporary appearances with fewer grout lines requiring maintenance. Subway tiles offer classic appeal but may appear busy around fireplace openings. I chose a running bond pattern that emphasizes the tiles’ proportions while maintaining visual simplicity. Herringbone patterns add interest but require precise installation and increased material waste. Consider your skill level and desired aesthetic when selecting patterns. Larger tiles generally install faster and create more seamless appearances, especially important for prominent fireplace locations.

How difficult is it to install grey tiles around a fireplace?
Installing tiles around fireplaces requires intermediate DIY skills and careful attention to safety considerations. Heat-resistant adhesives and proper clearances from firebox openings are essential for safety. Cutting tiles around irregular shapes demands patience and proper tools like wet saws. Surface preparation consumes significant time but determines installation success completely. I recommend starting with simpler projects before attempting fireplace installations. Professional installation ensures proper safety compliance and warranty coverage. However, experienced DIYers can achieve excellent results with proper planning, quality materials, and adequate time allocation for the project.
What maintenance do grey fireplace tiles require?
Grey fireplace tiles require minimal maintenance compared to natural stone or brick alternatives. Regular dusting with microfiber cloths prevents buildup of soot and debris from fireplace use. Monthly damp mopping with neutral pH cleaners maintains the surface appearance without damaging grout or tile. Sealed grout lines resist staining and require annual resealing for optimal protection. Heat damage rarely occurs with quality porcelain tiles rated for fireplace applications. Avoid abrasive cleaners that might scratch or dull the tile surface over time for best long-term results.
Do grey tiles increase home value compared to other fireplace materials?
Grey tiles typically increase home value more than outdated brick or stone surrounds, especially in contemporary markets. The neutral color appeals to broad buyer preferences while appearing updated and well-maintained. Quality tile installations demonstrate attention to detail and proper home maintenance to potential buyers. Professional appraisers often note modern fireplace surrounds as value-added features during assessments. However, regional preferences vary, with some areas favoring traditional materials over contemporary options. The key lies in quality installation and choosing timeless designs that won’t appear dated quickly.
Can I install grey tiles over existing brick or stone fireplace surrounds?
Installing tiles over existing surfaces is possible but requires careful assessment of structural integrity and proper preparation. Brick surfaces need thorough cleaning, sealing, and sometimes mechanical roughening for proper adhesion. Additional thickness may affect fireplace clearances and mantel positioning significantly. I recommend removing existing materials for best results, though this increases project complexity and cost. Professional consultation ensures proper installation techniques and safety compliance with local building codes. Surface preparation determines long-term success regardless of installation method chosen, making proper assessment crucial before beginning any fireplace renovation project.
Related Posts: