I stared at my dark red brick fireplace for months, feeling overwhelmed by its imposing presence that seemed to consume natural light and dominate my living room space. The deep burgundy tones clashed with my desire for a brighter, more contemporary aesthetic while maintaining the cozy warmth that drew me to this house initially. Friends suggested painting it solid white, but something about covering those beautiful textures completely felt wrong to my design sensibilities. Then I discovered whitewashing, a technique that would allow the brick character to show through while dramatically lightening the overall appearance. This revelation sparked an exciting transformation project that would test my DIY skills and patience.
Researching whitewash techniques revealed a fascinating history dating back centuries, when European homeowners used lime-based solutions to protect and brighten interior surfaces. Traditional whitewash consists of lime putty, salt, and water, creating a breathable coating that allows moisture to pass through while providing antimicrobial properties. Modern alternatives include diluted latex paint or specialized whitewash products that offer easier application and more predictable results. I chose a contemporary approach using white latex paint mixed with water, creating a translucent coating that would preserve the brick texture while achieving the lighter appearance I craved. The technique promised forgiving application with beautiful, organic results.

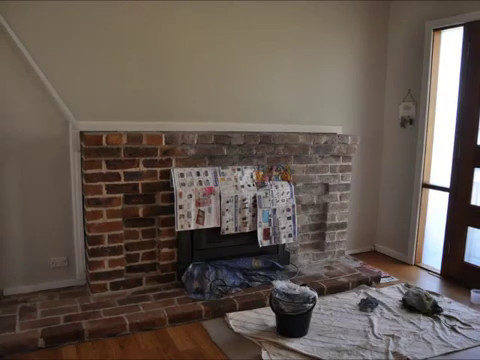
Preparing my brick fireplace required thorough cleaning to remove decades of soot, dust, and previous treatments that might interfere with proper adhesion. I started with a stiff brush and warm, soapy water, scrubbing each brick individually to reveal the original surface texture beneath accumulated grime. Stubborn areas needed stronger intervention, so I applied a mild muriatic acid solution following safety protocols that included proper ventilation and protective equipment. The cleaning process took an entire weekend, but seeing the true brick color emerge from under years of neglect felt incredibly satisfying. Proper preparation would determine whether my whitewash application succeeded or failed miserably.
Mixing my whitewash solution felt like conducting a chemistry experiment, as achieving the perfect consistency required careful attention to paint and water ratios. I started with a 50-50 mixture, testing it on hidden areas to evaluate coverage and opacity before committing to the visible surfaces. The consistency needed to be thin enough to soak into brick pores while maintaining enough body to provide adequate coverage and color impact. After several test batches, I settled on a 60-40 paint-to-water ratio that delivered the translucent coverage I desired. Working in small batches prevented the mixture from separating and ensured consistent results throughout the application process.

Applying whitewash proved more forgiving than traditional painting, as the technique embraces imperfection and encourages organic variation across the surface. I used a large brush to apply the mixture liberally, working it into mortar joints and brick textures while maintaining a wet edge to prevent obvious overlap marks. The key involved working quickly to blend sections while the whitewash remained workable, creating seamless transitions between areas. Some bricks absorbed more mixture than others, creating natural variation that enhanced the authentic, aged appearance I sought. The random patterns emerging from differential absorption looked intentional rather than accidental, building my confidence as the project progressed.
The first coat revealed dramatic transformation potential, though the coverage appeared lighter than my final vision required for optimal impact. I allowed complete drying before evaluating results, as whitewash continues changing appearance as moisture evaporates and the coating cures. The initial application showed promise but needed additional layers to achieve the brightness level I desired while maintaining sufficient texture visibility. Planning for multiple thin coats rather than a single heavy application would prevent the flat, painted look that defeats the purpose of whitewashing. Patience during this phase would determine whether the final result appeared professionally executed or amateur.

Building up layers required careful timing between coats, as applying subsequent layers over incompletely dried whitewash could create muddy results or surface damage. I waited 24 hours between applications, testing inconspicuous areas for proper curing before proceeding with full coverage. Each additional coat provided incremental lightening while preserving the underlying brick character that made this technique superior to solid paint coverage. The third coat achieved the perfect balance between brightness and texture visibility, creating depth and interest impossible with conventional painting methods. Standing back to evaluate progress, I felt amazed by the transformation taking place before my eyes.
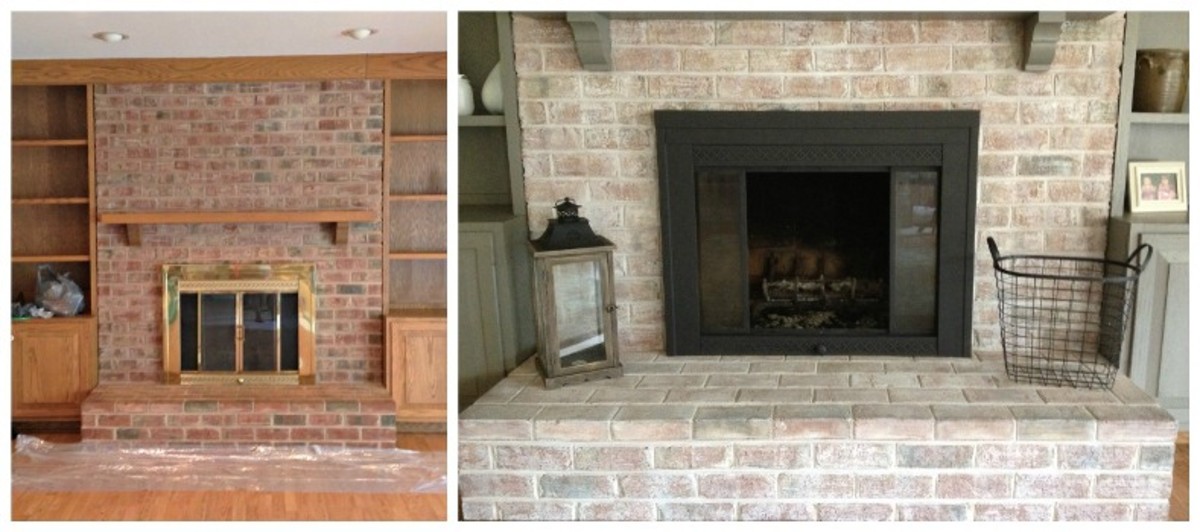
Living with my whitewashed fireplace has exceeded every expectation I harbored during the challenging application process, providing daily satisfaction that justifies the time and effort invested. The lighter surface reflects natural light throughout the room, making the entire space feel larger and more welcoming than before. The subtle texture variations create visual interest that changes with different lighting conditions throughout the day, preventing the monotony associated with flat painted surfaces. Guests consistently compliment the authentic, organic appearance while expressing surprise that I completed the transformation myself. The fireplace now serves as a beautiful focal point rather than an overwhelming presence dominating the room.

Maintenance of my whitewashed fireplace requires minimal effort compared to painted surfaces that show every fingerprint and scuff mark clearly. The textured surface and organic appearance naturally camouflage minor imperfections and daily wear patterns that would be obvious on smooth painted finishes. Occasional dusting with a soft brush removes accumulated debris without damaging the whitewash coating, while spot cleaning addresses isolated stains when necessary. The breathing quality of whitewash prevents moisture problems that sometimes plague solid paint applications in fireplace environments. Periodic touch-ups blend seamlessly with existing coverage, making maintenance repairs virtually invisible when properly executed.
Reflecting on this transformation project, I realize that whitewashing my brick fireplace taught me valuable lessons about embracing imperfection and trusting traditional techniques that have proven successful over centuries. The organic, hand-applied appearance creates a character impossible to achieve with modern roller applications or spray techniques that produce uniform coverage. My living room now feels balanced and bright while retaining the cozy atmosphere that initially attracted me to this house. The project costs less than professional painting while delivering superior results that honor the original brick construction. This experience convinced me that sometimes the best solutions combine historical wisdom with contemporary materials and personal creativity.
What is the difference between whitewashing and painting brick?
Whitewashing creates a translucent coating that allows brick texture and color variations to show through, while paint forms an opaque layer that completely covers the underlying surface. Whitewash soaks into porous brick rather than sitting on top, creating a more natural, aged appearance that develops character over time. Paint provides uniform coverage and color but can trap moisture against brick surfaces, potentially causing problems. Whitewash remains breathable, allowing moisture to pass through naturally. The application techniques differ significantly, with whitewash encouraging organic variation while paint demands uniform coverage for a professional appearance.
Can I whitewash over previously painted brick?
Whitewashing over painted brick requires careful surface preparation and may not achieve the same authentic results as application over raw brick surfaces. Existing paint prevents proper absorption, reducing the characteristic translucent effect that defines quality whitewash applications. Light sanding or chemical stripping may improve adhesion, but complete paint removal provides optimal results. Test inconspicuous areas first to evaluate coverage and appearance before committing to the full application. Consider whether the existing paint color will show through and affect your desired final appearance. Professional consultation may be worthwhile for complex situations involving multiple paint layers.

How long does a whitewash finish typically last?
Properly applied whitewash can last five to ten years with minimal maintenance, though longevity depends on environmental conditions, application technique, and brick porosity. Interior applications generally outlast exterior installations due to reduced weather exposure and UV damage. High-traffic areas or surfaces exposed to frequent cleaning may require touch-ups sooner than protected locations. The organic aging process enhances appearance over time, with gradual wear creating authentic patina. Unlike paint that chips or peels obviously, whitewash wear appears natural and gradual. Periodic touch-ups blend seamlessly with existing coverage, extending overall lifespan significantly.
What tools and materials do I need for whitewashing brick?
Essential whitewashing supplies include white latex paint, water for mixing, large natural bristle brushes, plastic sheeting for protection, and cleaning materials for preparation. Mixing containers should be large enough for working batches while remaining manageable for consistent results. Drop cloths protect surrounding surfaces from inevitable drips and splashes during application. Cleaning supplies include scrub brushes, mild detergent, and potentially muriatic acid for stubborn stains. Safety equipment encompasses gloves, eye protection, and adequate ventilation when using chemical cleaners. Quality brushes make a significant difference in application ease and final appearance.

Should I seal whitewashed brick or leave it natural?
Sealing whitewashed brick depends on location and expected wear patterns, with high-traffic areas benefiting from protective coatings while decorative applications may not require sealing. Interior fireplaces typically don’t need sealing unless exposed to excessive moisture or cleaning frequency. Sealers can alter the natural matte appearance and reduce breathability, which makes whitewash superior to solid paint. If sealing seems necessary, choose breathable products specifically designed for masonry applications. Test sealers in inconspicuous areas first to evaluate appearance changes. Consider maintenance requirements and long-term appearance goals when deciding whether protection outweighs natural aging benefits.
Can I adjust the opacity of my whitewash mixture?
Whitewash opacity is easily adjusted by changing paint-to-water ratios, with more paint creating heavier coverage and more water producing lighter, more translucent effects. Start with equal parts paint and water, then adjust based on test applications and desired appearance. Higher paint ratios provide better coverage but may obscure brick texture, while thinner mixtures enhance transparency but require more coats for adequate coverage. Multiple thin coats generally produce superior results compared to single heavy application,s regardless of mixing ratios. Document successful ratios for consistent results across large surfaces and future touch-up applications.

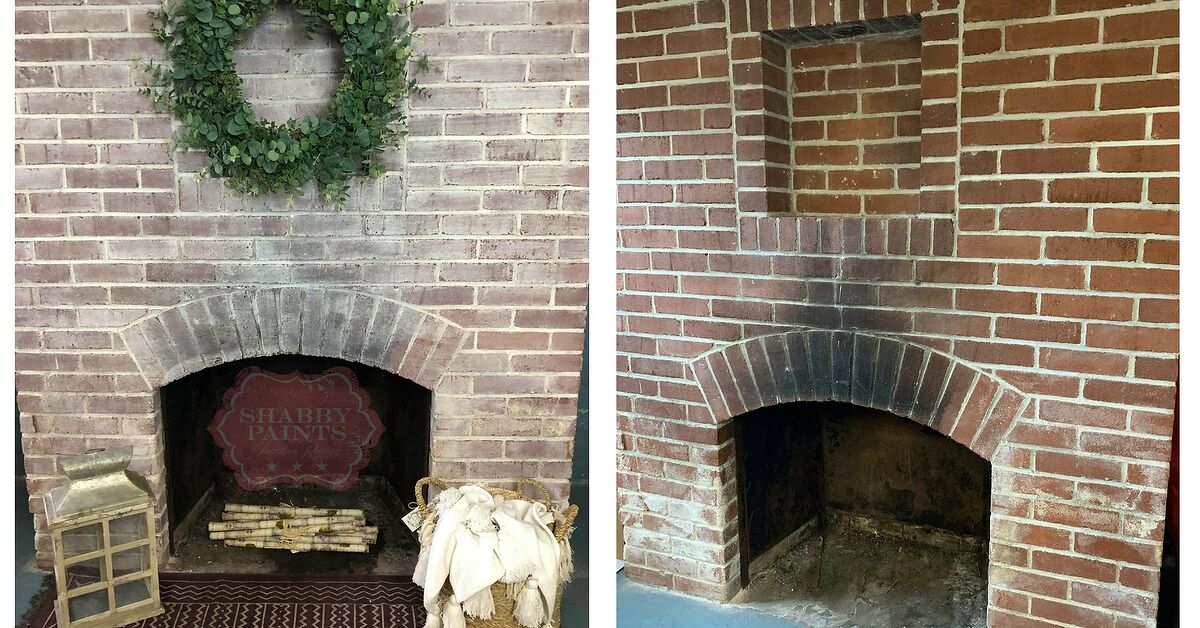
Fireplace Update: Whitewashing Brick fireplace makeover, Fireplace makeover, Fireplace update

Whitewashing a Brick Fireplace
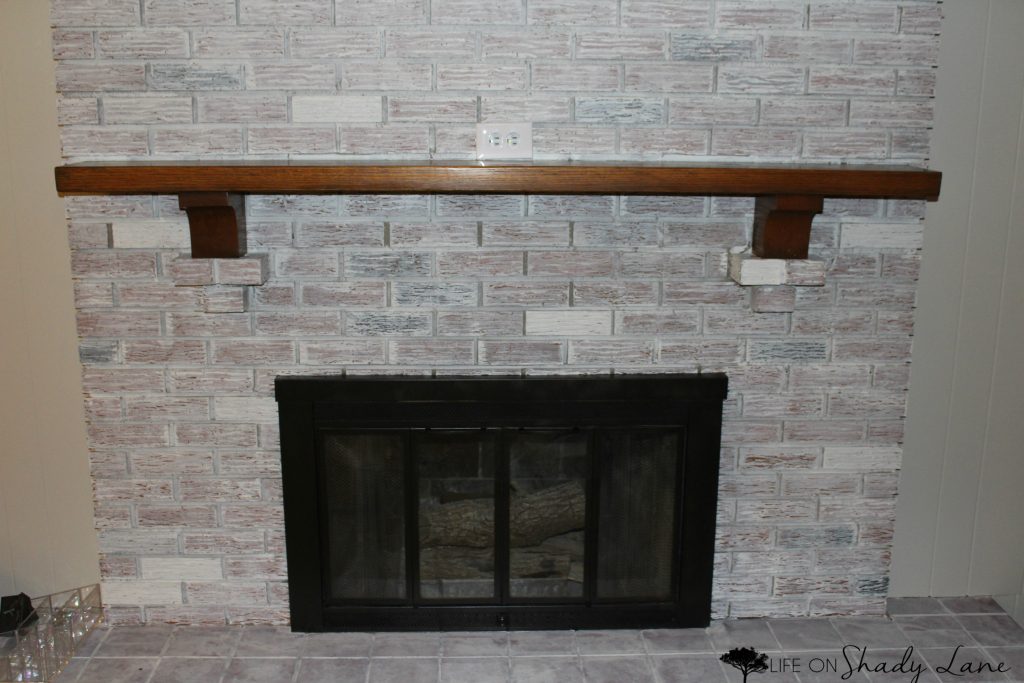
How to Whitewash a Brick Fireplace Life on Shady Lane
Our Farmhouse White Washing a Stone Fireplace — stars & field Stone fireplace makeover

Fixes for Updating a Fireplace HubPages
How To Whitewash A Brick Fireplace: 8 Tutorials – Shelterness
Related Posts: