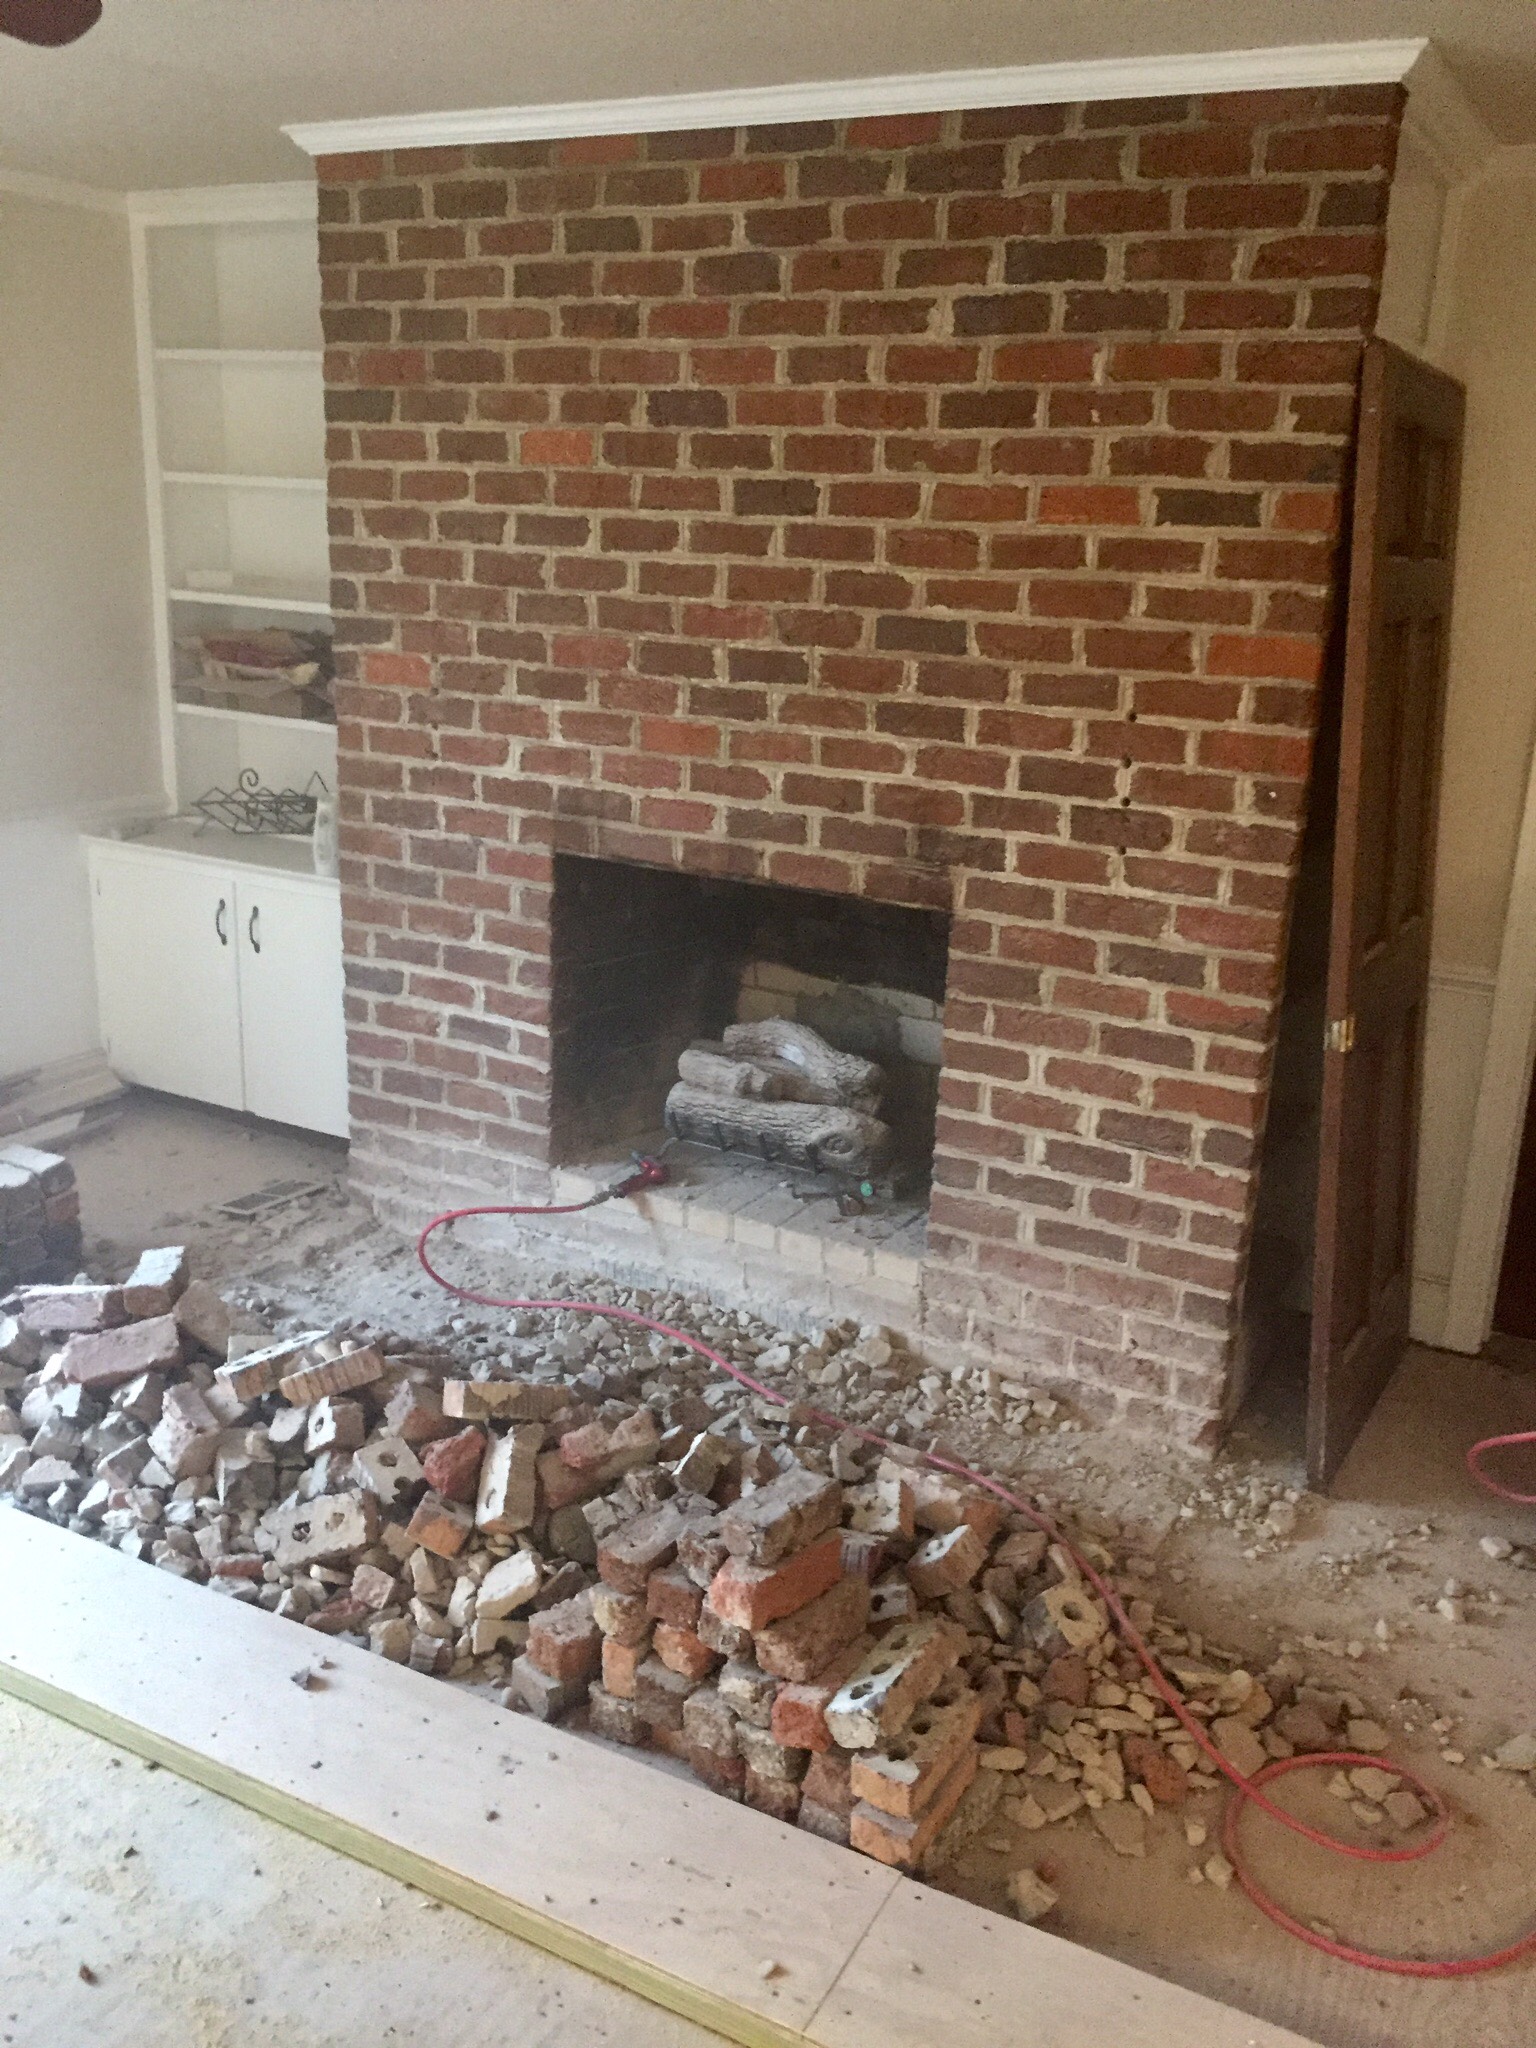
When I bought my 1960s ranch house three years ago, the massive brick fireplace dominated the living room, but not in a good way. Decades of smoke staining, misguided paint jobs, and neglect had turned what should have been a stunning focal point into an eyesore that real estate agents suggested I cover or remove. Instead, I saw potential in those vintage bricks, each one handmade with subtle color variations and textures that modern bricks cannot replicate. My journey to restore this fireplace taught me about brick chemistry, historical construction methods, and the patience required to bring architectural features back to their original glory while respecting their age and character.
Understanding the brick type and era became my first detective work. I carefully examined the bricks, noting their irregular shapes, varied colors ranging from deep red to burnt orange, and the way mortar was tooled in a traditional struck joint pattern. Research helped me identify them as clinker bricks, produced in coal-fired kilns where some bricks were placed too close to the heat, creating the darker, almost glazed surfaces and warped shapes that were considered defects at the time but are now prized for character. These imperfect bricks were typically used in basement walls or utility areas, but some adventurous 1960s builders incorporated them into feature walls and fireplaces, embracing their organic beauty.

The decision between restoration and painting sparked passionate debates with friends and family. Many urged me to whitewash or paint the brick to lighten the room and modernize the look. I agonized over this choice, spending weeks with sample boards testing different approaches. Ultimately, I couldn’t bring myself to cover the beautiful natural brick colors and textures with paint. I’d seen too many tragic examples of painted brick where homeowners later regretted covering original materials. I decided on full restoration to natural brick, knowing it would be more work but would preserve the fireplace’s authentic character and maintain options for future owners who might want different aesthetics.
Removing decades of soot and smoke staining required research into safe, effective cleaning methods. I learned that harsh chemicals and pressure washing can damage vintage brick and mortar, especially the softer lime-based mortar used in older construction. I started with the gentlest approach, TSP solution and soft-bristled brushes, working on small sections to assess results. The initial cleaning revealed that some dark areas were not just surface staining but actual smoke penetration into the porous brick. For stubborn stains, I used a poultice method, applying a thick paste that drew stains out as it dried. This process was tedious, taking weeks of repeated applications, but gradually the brick’s original warm tones emerged.

Dealing with previous paint applications proved to be my biggest restoration challenge. Someone had partially painted the hearth and mantel area with what appeared to be latex paint that had chipped and peeled over time. Paint removal from porous brick is notoriously difficult because paint seeps into every tiny crevice and texture. I tried various paint strippers specifically designed for masonry, working carefully to avoid damaging the brick surface beneath. Some areas required mechanical removal with wire brushes and scrapers. I accepted that traces of paint would remain deep in the brick’s texture, deciding that these remnants added to the fireplace’s history rather than detracting from its beauty.
The mortar condition required careful assessment and selective repointing. Over sixty years, some mortar joints had deteriorated, crumbled, or cracked, compromising both appearance and structural integrity. I learned to distinguish between cosmetic wear that added character and actual damage requiring repair. For repointing, I researched historical mortar formulations, discovering that matching not just color but also strength and flexibility is crucial when working with vintage brick. I mixed a custom lime-based mortar that was softer than modern cement-based products, ensuring the mortar would remain the weak point in the system and protect the valuable bricks from damage during future settling or movement.
Repointing the joints became a meditative practice that taught me respect for original craftsmen. Using traditional tools, a pointing trowel and jointing iron, I carefully removed damaged mortar to appropriate depths and packed in new mortar, matching the original struck joint profile. The work required steady hands and patience, each joint needed careful attention to maintain consistent depth and profile. I worked in small sections, ensuring fresh mortar stayed workable and properly cured. Matching the mortar color precisely took multiple test batches, adjusting ratios of sand, lime, and pigments until achieving a perfect match that would blend invisibly with original joints once weathered.
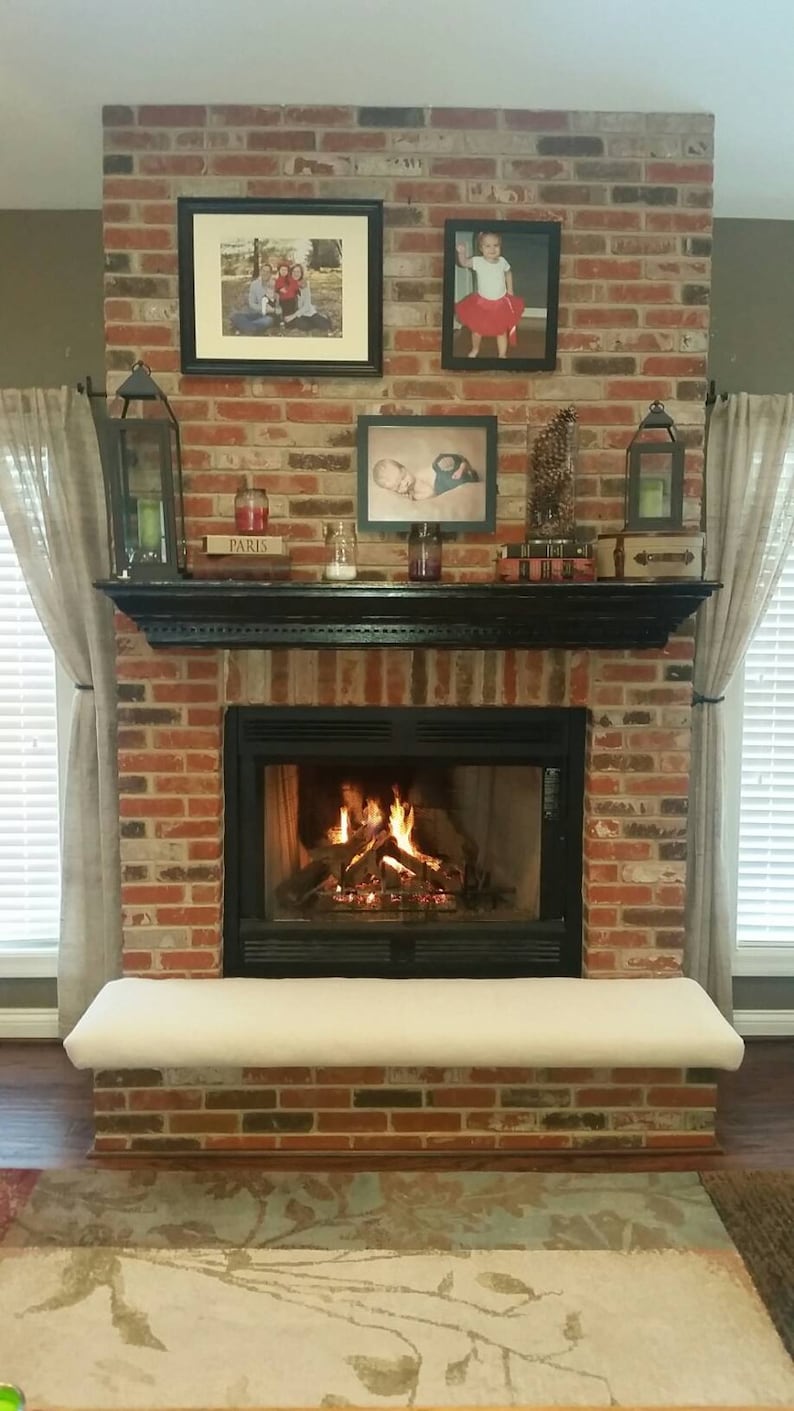
The hearth restoration revealed unexpected treasures beneath decades of grime. Once cleaned, the hearth bricks showed beautiful fire flash patterns, areas where flames in the kiln created natural color gradations from deep purple to orange. I also discovered the original brass fireplace damper handle, tarnished but functional, which I carefully polished back to life. These discoveries reinforced my decision to restore rather than replace or cover. Each element told part of the fireplace’s story, connecting me to the original builders and decades of families who gathered around these same bricks for warmth and companionship.

Deciding on a finish treatment required balancing protection with authenticity. Some experts suggested sealing the brick to protect against future staining and make cleaning easier. However, I learned that sealers can darken brick, create unnatural shine, and trap moisture leading to spalling. After much consideration, I chose to leave the brick unsealed, accepting that it would naturally patina over time and require regular maintenance. This decision honors the brick’s original state and allows it to breathe naturally. I did apply a specialized soot guard to the firebox area that prevents heavy staining while remaining invisible and breathable.
Living with my restored vintage brick fireplace has been deeply satisfying. The warm, varied tones of the clinker bricks create visual interest that draws the eye and anchors the entire room. The irregular shapes and natural imperfections remind me daily that beauty doesn’t require perfection. Friends who initially questioned my restoration decision now compliment the fireplace constantly, often running their hands over the textured brick and admiring the craftsmanship. Most importantly, lighting a fire and watching flames reflect off those sixty-year-old bricks connects me to the home’s history and all the families who came before me, making this house truly feel like mine.

Should I paint my vintage brick fireplace or restore it to its natural brick?
This deeply personal decision depends on your aesthetic preferences and commitment to maintenance. I chose restoration because I valued the authentic brick colors and didn’t want to permanently alter original materials. However, painting is reversible if done correctly and can brighten dark spaces. Consider that paint requires regular maintenance and eventual repainting. If you paint, use breathable masonry paint and avoid sealing brick first. Test your decision by living with the brick for several months before committing to paint.
How much did your vintage brick fireplace restoration cost?
My DIY restoration cost approximately $800 in materials over four months. Cleaning supplies, TSP, and paint removers totaled $150. Lime, sand, and pigments for custom mortar ran $200. Specialized brushes, tools, and safety equipment added $250. Soot guard coating costs $100, with miscellaneous supplies bringing the total to $800. Professional restoration quotes ranged from $2,500-4,500. The time investment was substantial, roughly 120 hours of work. However, the satisfaction and preservation of original materials made every hour worthwhile.

How do I maintain a vintage brick fireplace after restoration?
Maintenance is straightforward but consistent. I vacuum the brick monthly using a soft brush attachment to remove dust. Annually, I clean with a mild TSP solution and soft brushes, avoiding harsh chemicals. I monitor mortar joints for deterioration and repoint as needed. After each fire, I remove ashes promptly and clean the firebox once cool. The key is gentle, regular care rather than aggressive periodic cleaning. I’ve accepted that the brick will develop new patina over time, which I view as natural aging rather than damage requiring intervention.
Can I remove paint from brick without damaging the original surface?
Paint removal from brick is challenging but possible with patience. I used masonry-specific paint strippers, applying multiple times and allowing proper dwell time. Mechanical methods like wire brushing and careful scraping helped, but risk scratching softer bricks. Some paint always remains in deep texture, which I learned to accept. Sandblasting and pressure washing can permanently damage vintage brick and should be avoided. Success requires testing methods on inconspicuous areas and accepting that perfect removal may not be achievable without harming the brick.
How can I tell if my brick fireplace mortar needs repointing?
I learned to assess mortar condition by examining joint depth and integrity. Mortar recessed more than half an inch from the brick faces needs attention. Crumbling mortar that comes away with light pressure requires repointing. Cracks wider than hairline size indicate problems. However, minor surface erosion and weathering are normal character marks. I repointed only where structural integrity was compromised or where deep recession affected appearance. Not all aged mortar needs replacement; vintage character includes some wear that should be preserved rather than erased.
What’s the difference between vintage and modern bricks, and does it matter?
Vintage bricks like my clinker bricks were handmade with natural color variations, irregular shapes, and unique textures from wood-fired or coal-fired kilns. Modern bricks are machine-made with uniform dimensions and colors, lacking the organic character of vintage bricks. This matters for restoration because vintage bricks are often softer and more porous, requiring gentler cleaning methods and lime-based mortars. They also have irreplaceable aesthetic value. Understanding your brick type ensures appropriate care and helps you appreciate the craftsmanship embodied in your fireplace.

Stylish Fireplace Tile Ideas You Should Try for Your Fireplace

Stone veneer fireplace and archway. Profiles: Country Ledge & Tuscan Fieldstone Color: Texas

Related Posts: