I had been considering redoing my fireplace surround for several years. The original surround appeared out of date and did not complement the rest of my home’s design. I wanted something new and more in tune with my unique preferences. I began by examining the existing framework. Was it in decent condition? Did it require repairs? Before doing anything cosmetic, I ensured that the bones were solid. This step offered me a solid foundation and helped me prevent future problems.
After I established that the surround was stable, I removed the previous material. Depending on what’s there, this could mean removing tiles, stone, or a wooden mantle. In my situation, I had antique ceramic tile and a painted wooden frame. I used a pry bar and hammer with caution to avoid damage the wall underneath. It required some effort and time, but it was rewarding to peel back those antiquated layers and see the promise for something greater.

Choosing the new materials was likely the most fascinating part. I considered stone veneer, marble, tile, and salvaged wood. Each had a unique impact and expense. I chose a sleek, layered stone veneer that gave texture without dominating the area. The color palette included warm greys and beiges that complemented my furniture. If it was going to be near the firebox, I made sure the material was heat-resistant.
Then came surface preparation. This was important to getting the new materials to adhere properly. I meticulously cleaned the wall, fixed any uneven patches with patching compound, and put a cement backer board because stone veneer requires a solid surface. The prep work may not have been the most glamorous portion, but it made the installation procedure go more smoothly and helped the end product look professional.

Installing the new surround took some time, but it wasn’t too difficult. I applied the mortar according to the manufacturer’s directions, using a notched trowel. Then I placed each piece of stone firmly into place, beginning at the bottom and working my way up. I used spacers where necessary and took frequent steps back to ensure proper balance and arrangement. Taking my time here was crucial. Rushing would have resulted in uneven lines or misaligned pieces.
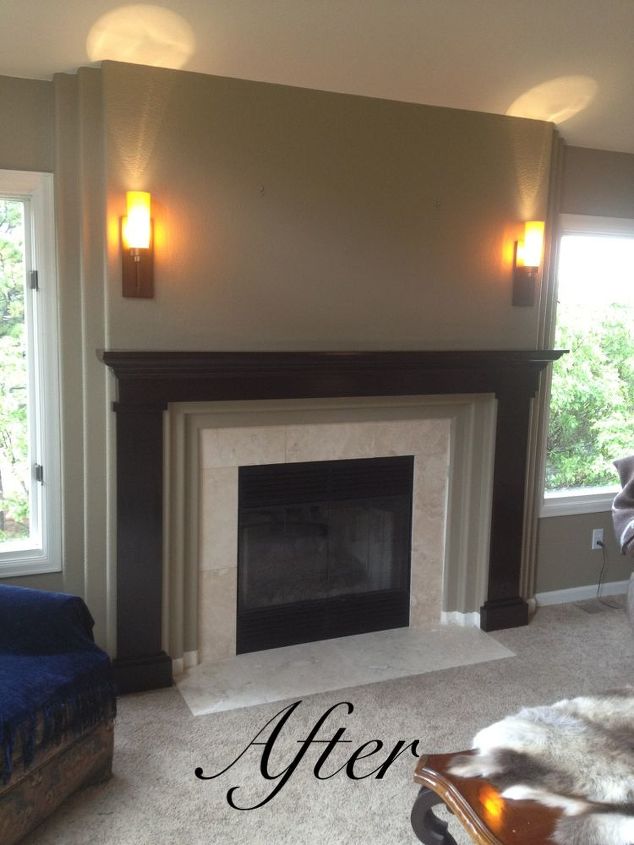
I considered whether to paint the old mantel, build a new one, or buy a pre-made choice. Finally, I made a basic floating mantel out of pine, dyed it a warm walnut color, and attached it securely to the studs. It provided the fireplace a clean finish and added a natural element to contrast with the stone. I enjoyed how the mantel turned out and how it provided a space for seasonal adornment.

I did not ignore the firebox trim. I replaced the previous brass trim with a sleek black version. It was a minor change that made a significant visual impact. I also ensured that everything was well sealed, particularly the borders of the surround. I used heat-resistant caulk to fill any gaps and give the surround a polished appearance. It made the design feel more intentional and comprehensive.
The final phase involved painting around the fireplace. After the installation and sealing were completed, I patched the walls with primer and paint. I chose a gentle white to keep the area bright and make the surround the focal point. Once the paint had dry, I decorated the mantel with candles, framed art, and a few personal touches. It felt like the room finally had something worth looking at.

Throughout the endeavor, I made an effort to pace myself. Redoing a fireplace surround does not have to take a single day. I divided it up over several weekends, making sure each layer was dry and secure before moving on to the next. I saved a lot of money by doing it myself, and I had complete control over the outcome. More significantly, I gained new abilities and felt proud every time I saw the final product.
My fireplace surround is now one of my favorite features in the house. It creates warmth in the space, both visibly and practically. The new materials complement the remainder of my home, and the project enhanced value without breaking the bank. It took some time and effort, but rebuilding my fireplace surround turned out to be one of the most rewarding home improvements I’ve completed.

What materials work best for renovating a fireplace surround?
I discovered that stone veneer, tile, and recycled wood are popular options. Stone provides texture and durability, while tile allows for patterns and color. Wood gives warmth. I chose stone veneer because it provided the modern yet rustic look I desired. If you’re placing it near the firebox, ensure sure it’s heat-safe.
Can I redo my own fireplace surround?
Yes, I did it myself, and it was extremely doable. You’ll need some basic tools, including a pry bar, level, mortar, and trowel. What truly helped was taking my time and doing a lot of planning. Watching videos and reading up on my specific materials provided me the confidence to execute it correctly. If you’re willing to learn, you can surely do it yourself.

How long does it take to renovate a fireplace surround?
In my instance, the project required two weekends. The first weekend was dedicated to demolition and preparation, while the second weekend was spent installing and finishing. Drying times for mortar and paint have been included to the schedule. If you’re doing it alone, plan to spread it out over a few days or weekends to ensure optimal results.
Should I remove the old surround first?
I did, and I believe it made a big difference. Removing the old surround allowed me to start again and verify that the new materials adhered correctly. It also allowed me to investigate the underlying wall and address any concerns. Attempting to cover up old material may appear to be a simpler solution, but it frequently results in more problems down the road.
Should I hire a professional or do it myself?
It depends on how comfortable you are. If you’re handy and patient, this could be a wonderful DIY project. I enjoyed learning and managing every detail. However, if you’re short on time or working with heavy materials like marble, hiring a professional could save you stress. There’s no shame in enlisting assistance if it means a better outcome.
What safety precautions should I take during this project?
I used gloves and goggles during the demo, a mask when working with dust, and made sure my fireplace was turned off and cool before beginning anything. I also ensured that my materials were suitable for high-heat environments. I also made sure to secure big pieces like the mantel into studs.

Fire place stone Fireplace redo, Fireplace mantels, Fireplace

Fireplace Redo Fireplace redo, Fireplace, Home reno

Step by Step Fireplace Remodel on Pinterest Lowes, Hearth and We

Fireplace redo Fireplace redo, Fireplace, Fireplace mantels

Redo fireplace surround. Modern trim Fireplace surrounds, Family room, Kitchen redo

Prodigious Useful Ideas: Old Fireplace Surround victorian fireplace dream homes.Faux Fireplace

Related Posts:
- Cottage Fireplace Surround
- DIY Rustic Fireplace Surround
- Vintage Cast Iron Fireplace Surround
- Delft Tile Fireplace Surround
- Fireplace Surround DIY Ideas
- Gas Fireplace Surrounds Ideas
- Grey Tile Fireplace Surround
- Modern Fireplace Surround Ideas
- DIY Electric Fireplace Surround Ideas
- How To Redo A Fireplace Surround